

Hello Everyone!
As discussed in my previous blog what is GFI Languard and how to install the GFI LanGuard . Today we will learn how to use the GFI Languard Network Scanner. GFI LanGuard is a network audit and patch management solution that helps user to easily manage and maintain end point protection every devices within Local Area Network. It automatically discover all the elements of your Network. computer, mobile, tablet, printer, servers, virtual machine, router- switches and laptop etc.
Features of GFI Languard
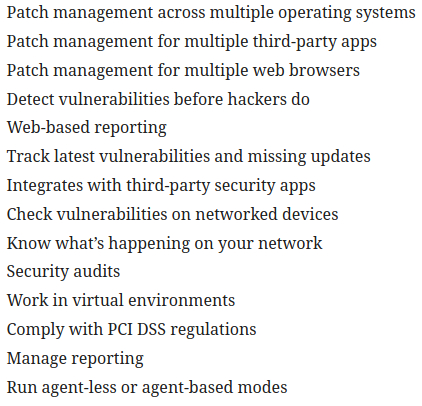
As we see there are so many features of GFI Languard we will use some of them.
Lets Begin!
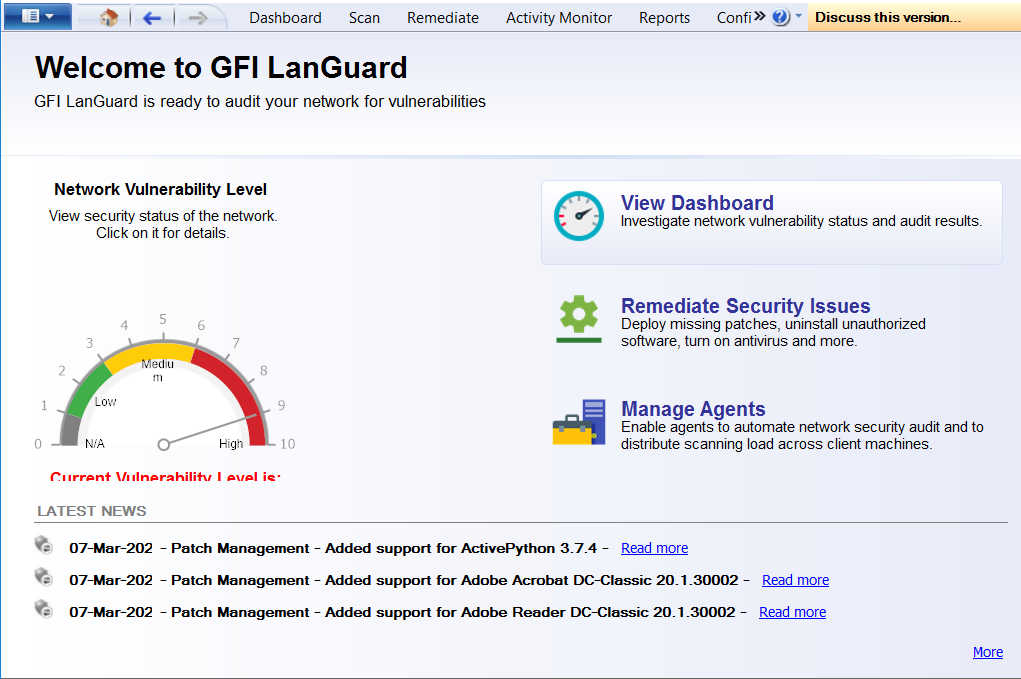
Launch the GFI Languard Network Scanner, GFI Languard dashboard
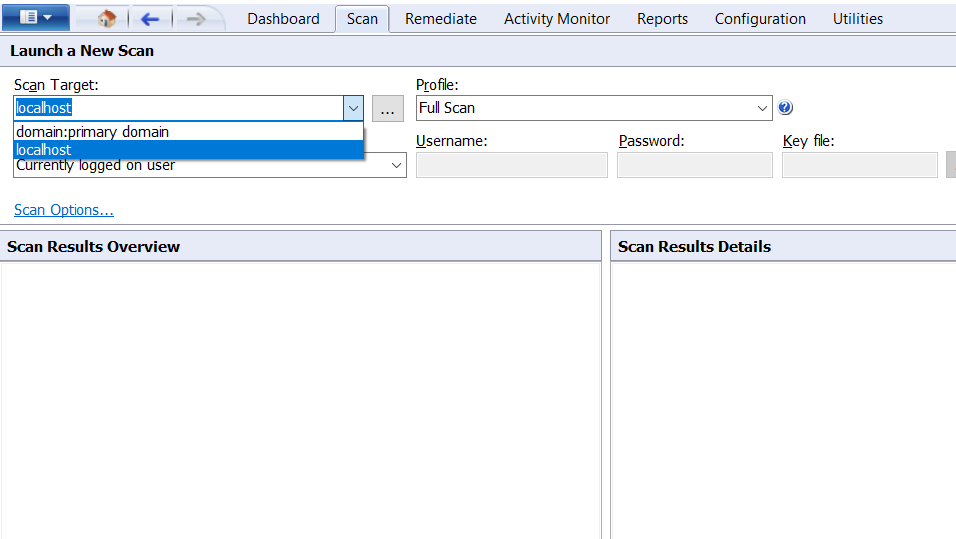
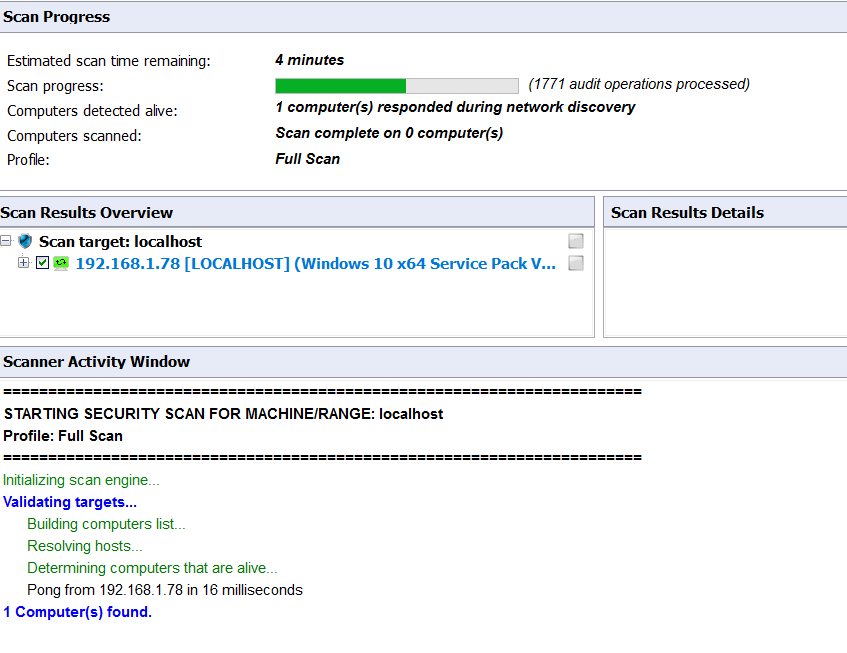
configure the scan, click on scan tab to scan the network or system. Here i choose localhost in which my GFI Languard is running.
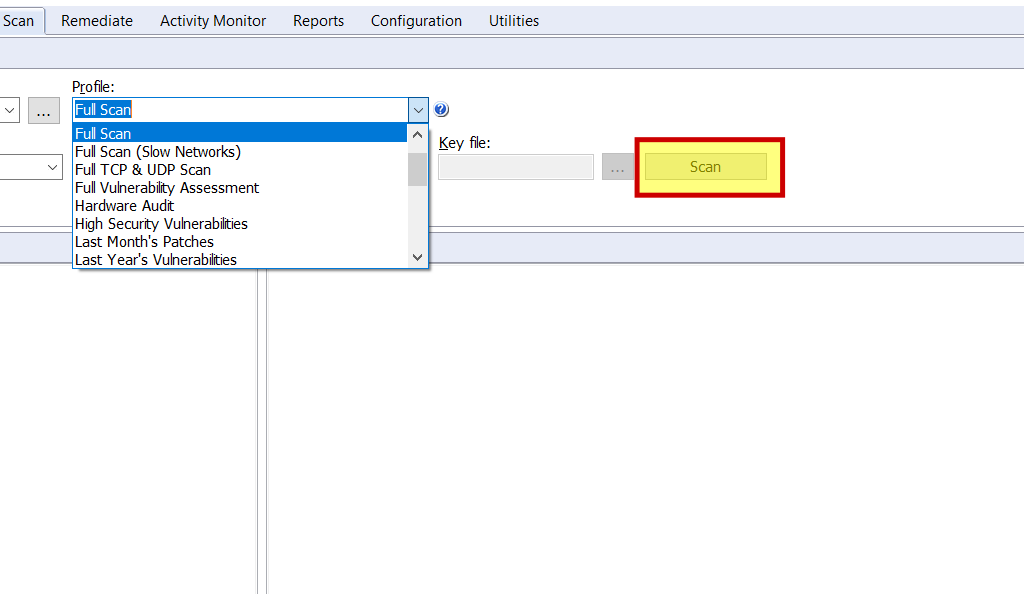
click on profile there is 20 type of scanning choose your option whatever you want to scan like full scan , full vulnerability assessment , hardware audit etc.. Here i choose the full scan. when you finish the scan setting click on scan button .
Now it start scanning the localhost it will take sometime be patient until the scan finish.
Scan completed for localhost check the interface
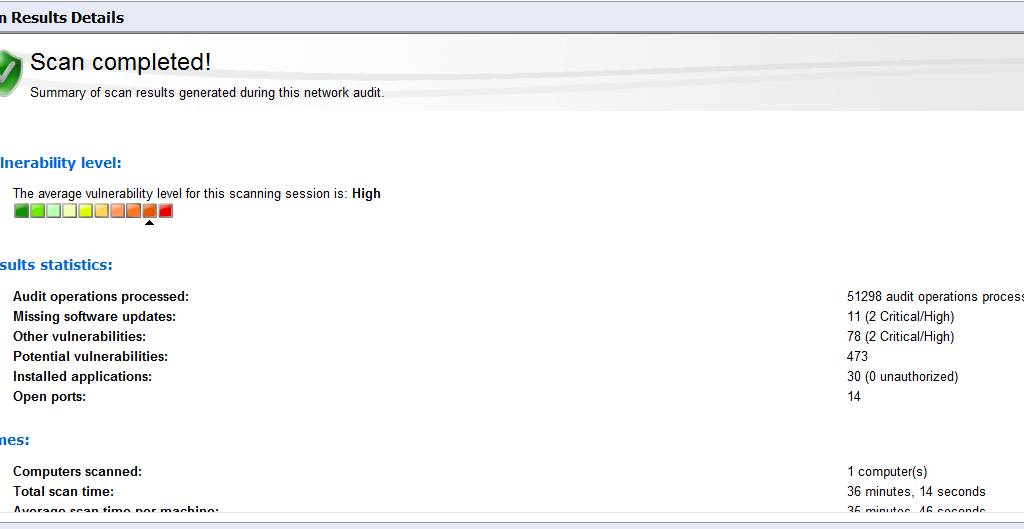
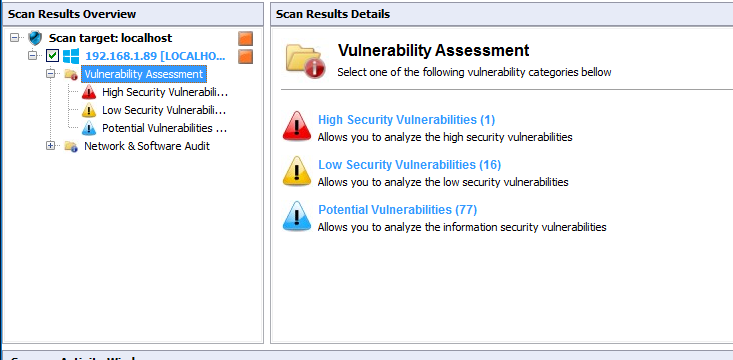
Once scan in completed check the scanning result and vulnerabilities
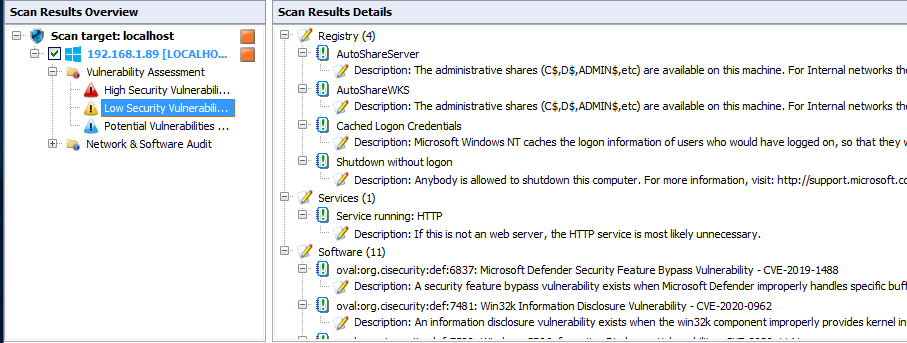
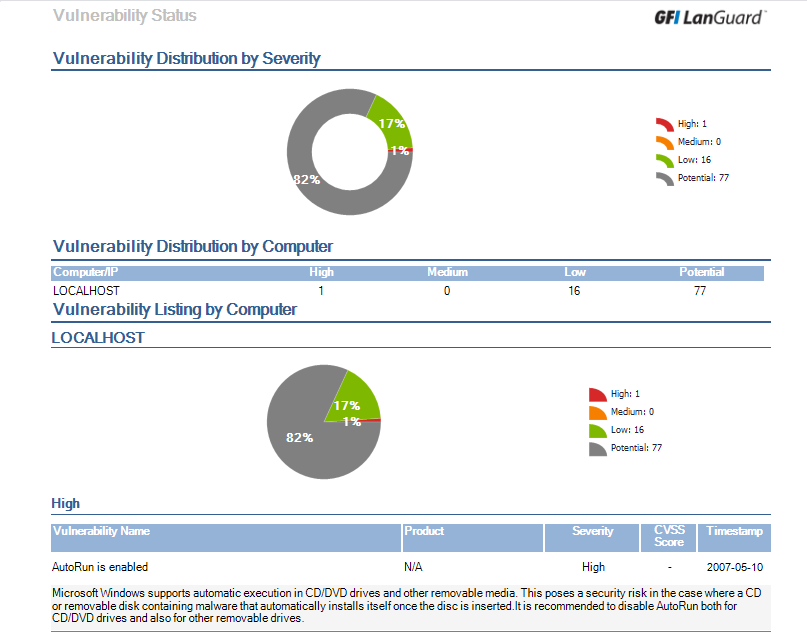
click on localhost left side of the interface then click on vulnerability assessment then check the vulnerability, High, low, potential, missing etc .
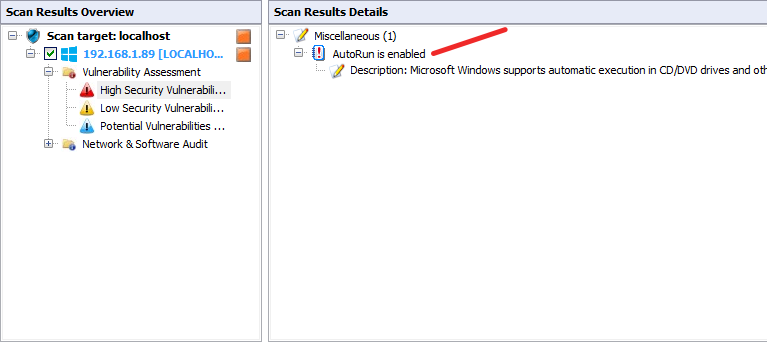
click on high security vulnerability and check, in my case autorun is enable, this is the high security vulnerability.
As you can check all the vulnerabilities like High, low, potential etc..
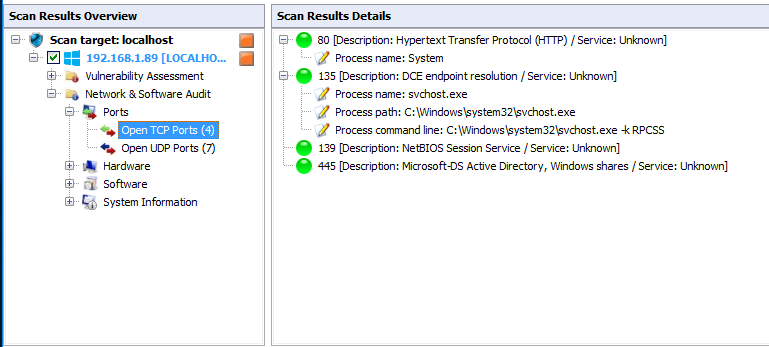
After vulnerability assessment Now check the Network and Software Audit. Click on it and check one by one .
click on Network and Software Audit then ports and check the TCP UDP port issues.
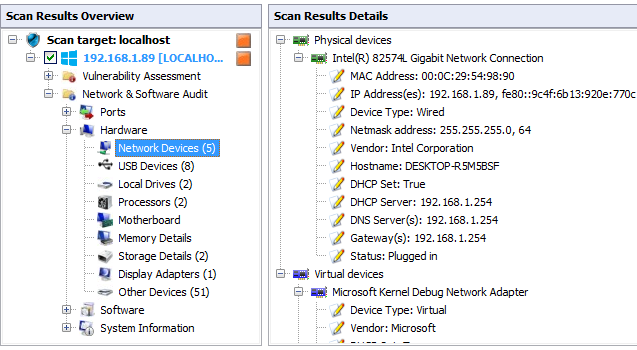
click on hardware here check all hardware information one by one. Like Network Device, USB device, Processor Motherboard memory, Storage details etc..
Here i check the Network Device information mac address IP address Hostname etc..
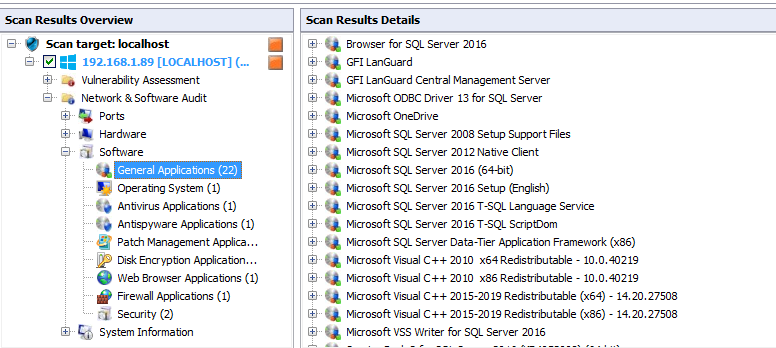
After the hardware information you can check the software information. click the software check one by one software related information.
Here i check the General Application information, what applications is running in my system.
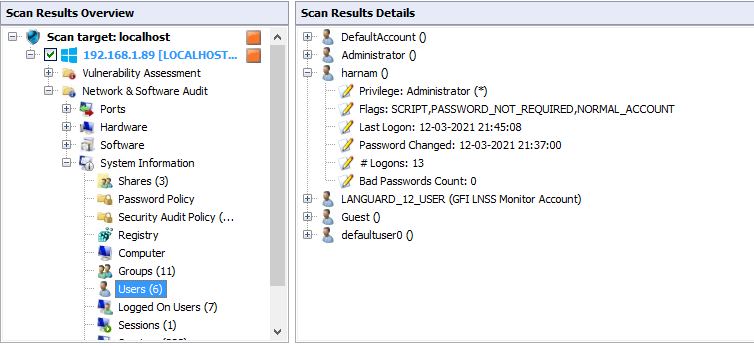
Like a Hardware and software information system information option is also available. click on system information and check the system’s information
Here i click on user and check the users information.
Click on Dashboard then overview, here is the all overview of the scan .
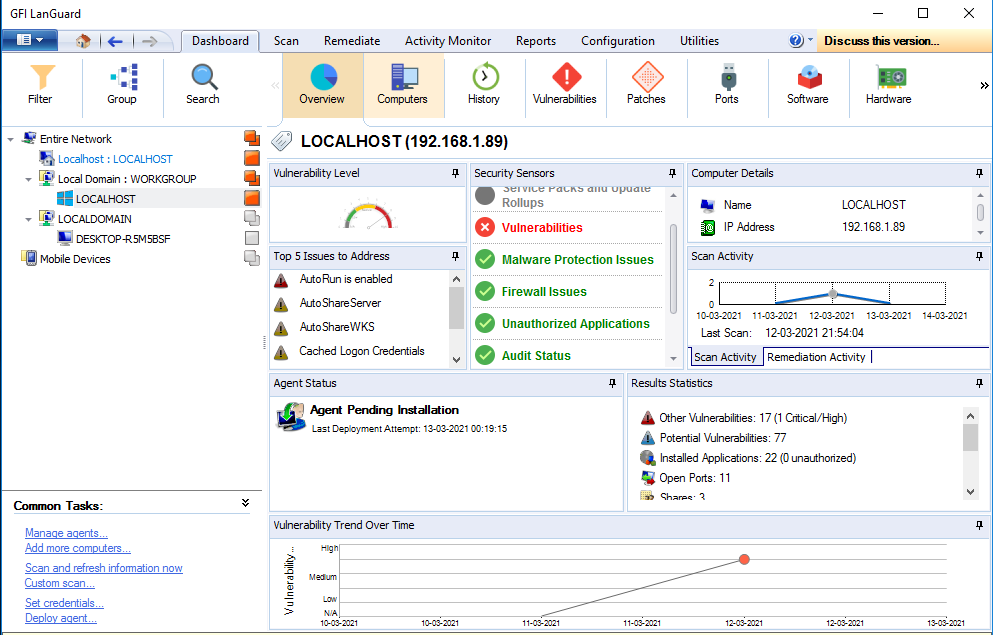
Here we can check the one by one information by single tab like computer information, History, vulnerability, Ports etc..
click on patch and we can to check how to patch the vulnerabilities.
Final we can generate the Report of complete scan. click on report tab and select the report type like want to generate computer security report, vulnerability status, patch status etc.
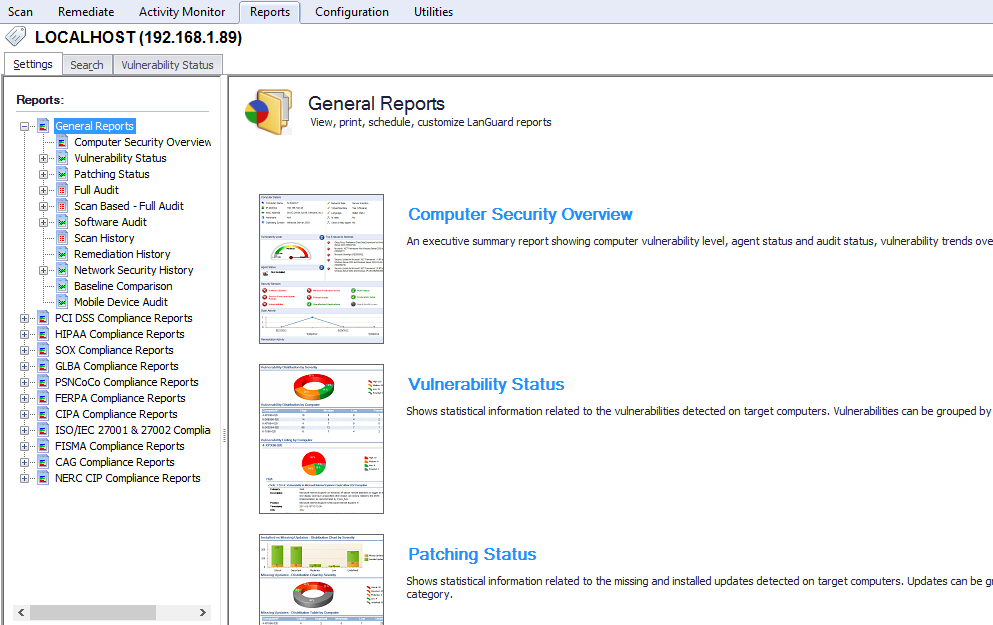
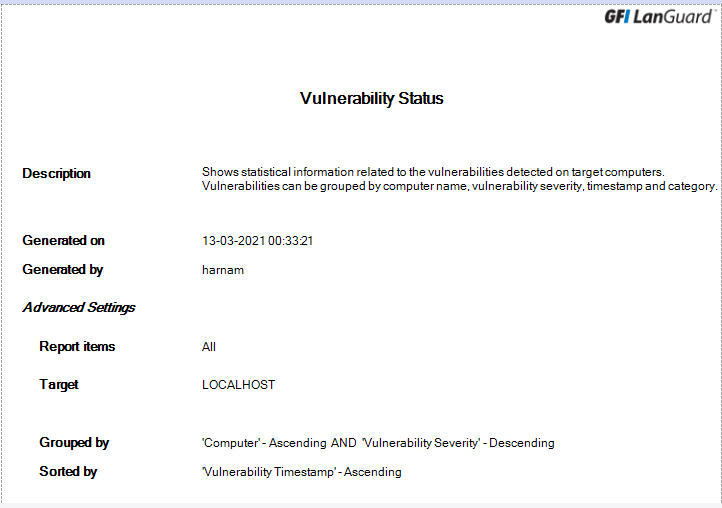
click on report type and then click on generate report. Here I generate the vulnerability status report.
We can generate report according to the security standards like PCI DSS Compliance, HIPAA, SOX, GLBA, SIPA, ISO/IEC 27001, FISMA etc..
click on security standard in my case PCI DSS compliance and then click on Audit policy and click on generate report.
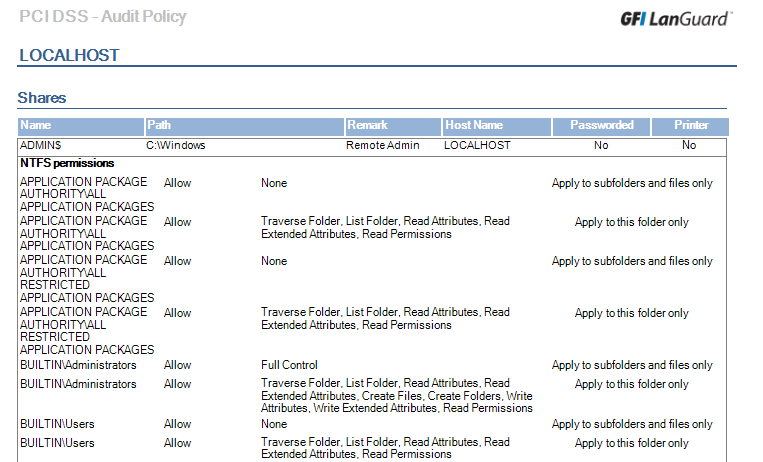
Here i generate the PCI DSS Audit Policy report.
Thanks For Reading!
Follow us On LinkedIn, Facebook, Twitter


